Thunderbird Setup
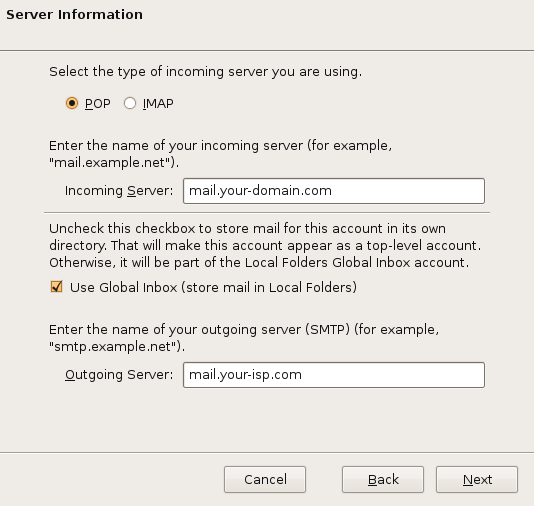
Thunderbird is an email client produced by Mozilla used for sending and receiving email. The screenshots include references to jdoe@your-domain.com and mail.your-isp.com. DO NOT use these as they are only examples. Instead, use your own email address and the name of the outbound email server provided by your Internet Service Provider (ISP).
IMPORTANT: Inbound email is handled by Truepath mail serves; however, outbound email is handled by your ISP. It is Truepath’s policy that you use your own ISP for sending email.
Before getting started, you should have two things, both of which should be obtained from your Internet Service Provider (ISP). Your ISP provides access to the internet through DSL, Cable, or even dial up. Refer to your ISP’s website to obtain this information easily.
FROM YOUR ISP:
- The name of the outbound server. The name usually has “smtp” in it. Example: smtp.west.cox.net or smtp.east.sbcglobal.com.
- The port number of the outbound server, also provided by your ISP. Typical port numbers are 25, 80, or 587.
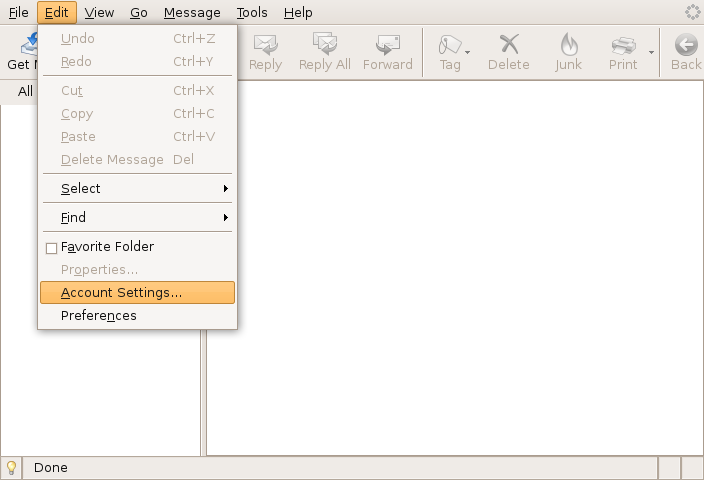
Step One: Open up Mozilla Thunderbird, from the Tools menu, select Account Settings. (Linux users – from the Edit menu select Account Settings.) Screenshots are from Ubuntu Linux so there may be slight variations in appearance.
Step Two: If you are setting up a brand new email account, then select “Add Account” (lower left); otherwise, select an existing account to modify.
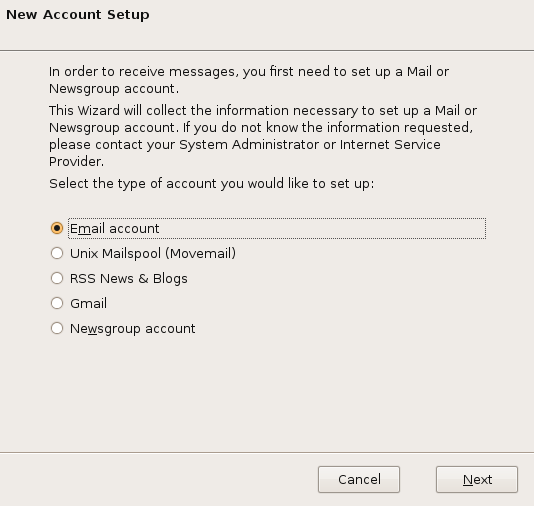
Step Three: Select “Email account” and click “Next” to continue.
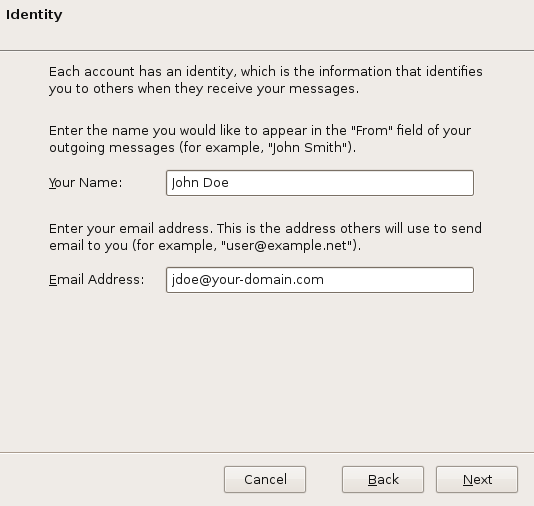
Step Four: Enter your name and email address.
Step Five: Truepath’s policy requires that you use your Internet Service Provider (ISP) for sending (outbound) email ( from your computer). You will need to contact them or look through the documentation they provided in order to know the name of the outbound server to use. Many times, the name is something like “smtp.west.isp.com”. In the rare case that you must use Truepath’s outbound (SMTP) server, then instead of “mail.your-isp.com”, use “mail.your-domain.com”.
Step Six: There is nothing to change on the next screen, click “Next”.
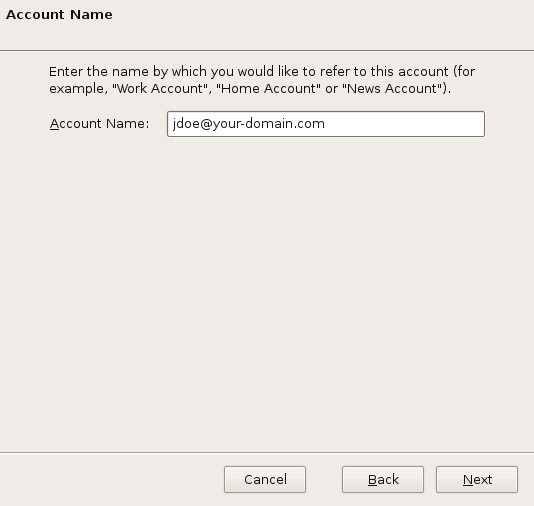
Step Seven: Here you can give the account an alias, then click “Next”. Click “Finish” on the next screen to complete the wizard.
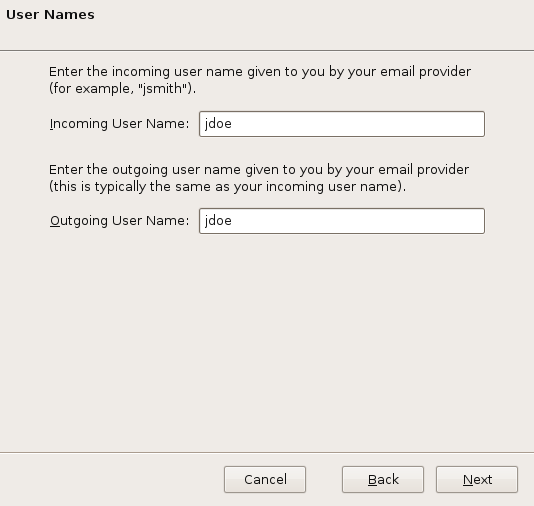
Step Eight: Select “Server Settings” just below your newly created email account. The setting under “POP Mail Server” is 110. Check to make sure the “User Name” includes the domain name.

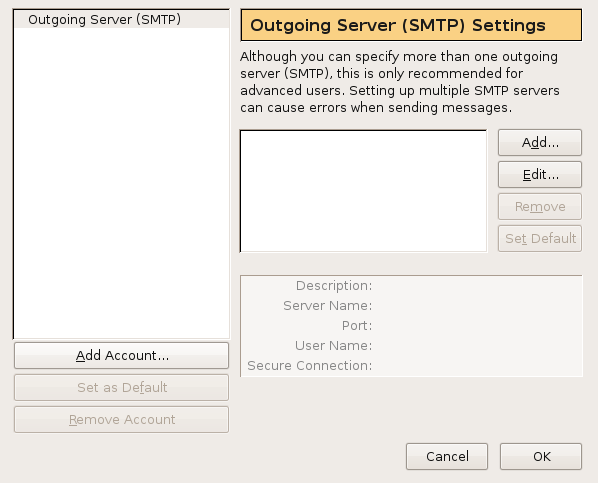
Step Nine: Select “Outgoing Server (SMTP)” below the email account(s). Select the server settings for the account you wish to change and click “Edit”. Use the port # provided by your ISP to fill in the field “Outgoing server (SMTP)”. In the rare case that your ISP does not provide an outbound email server and port number (usually port 25, 80, or 587), then use port 587 instead. Make sure to check the box for “Use secure authentication”.
I am text block. Click edit button to change this text. Lorem ipsum dolor sit amet, consectetur adipiscing elit. Ut elit tellus, luctus nec ullamcorper mattis, pulvinar dapibus leo.

Step Ten: Finally, click on the “OK” button to finalize your setup. Thunderbird is now ready to use.